Setup Nuxt JS App
Today, we will setup the nuxt.js v2 project using npx and npm command.
Prerequisite
- Node.js should be installed in your system or if not installed then setup first Node.js.
- Download one code editor to write the code, VS Code. Also install Vetur code extension that will help in different ways while coding.
Check Node Installed or Not in your system
node --version
npx --version
npm --version

Step 1: Create app
Create Nuxt App using npx command
npx create-nuxt-app <project-name>
OR
Create Nuxt App using npm command
npm init nuxt-app <project-name>
Step 2: Select optons
After running the above command It will ask you some questions like: name, Nuxt options, UI framework, TypeScript, linter, testing framework, etc.
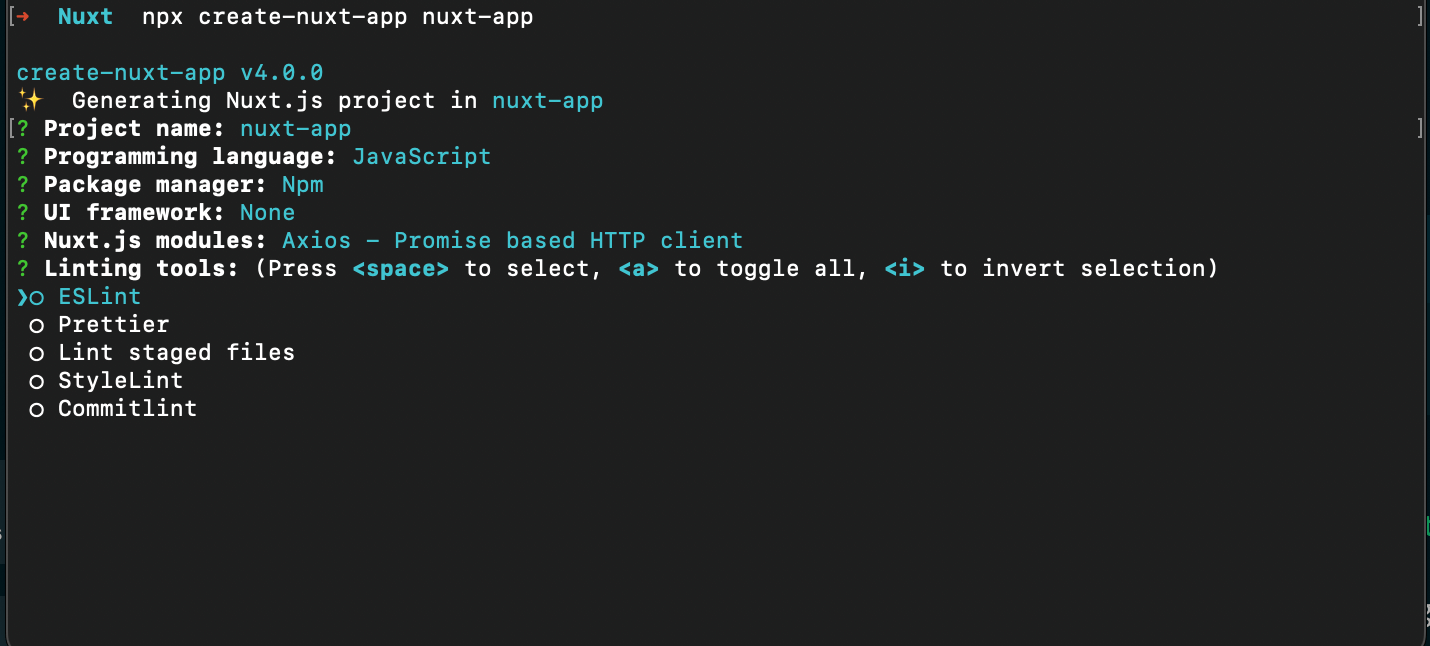
Some of the important options, we are highlighting below.
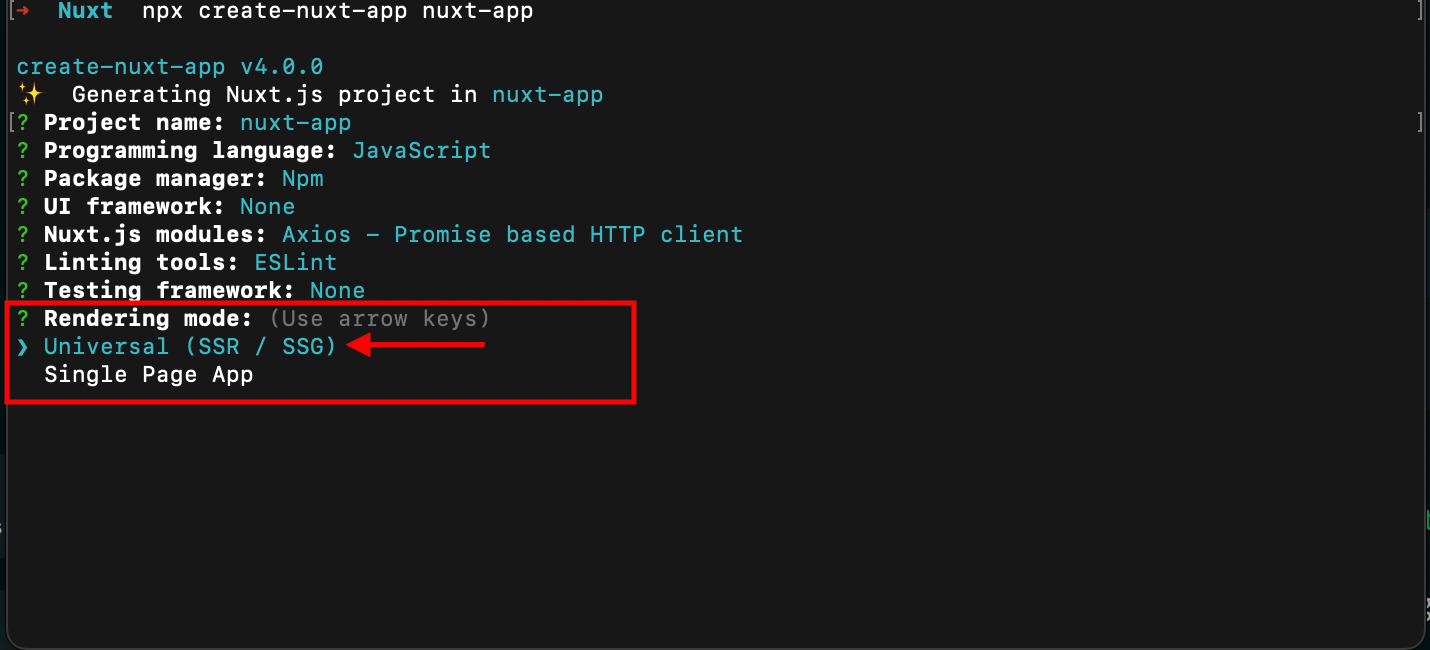
Step 2.1: Choose rendering options
In Nuxt we have two options for the rendering. One is universal and second is single page. In this tutorial we are selecting universal one.
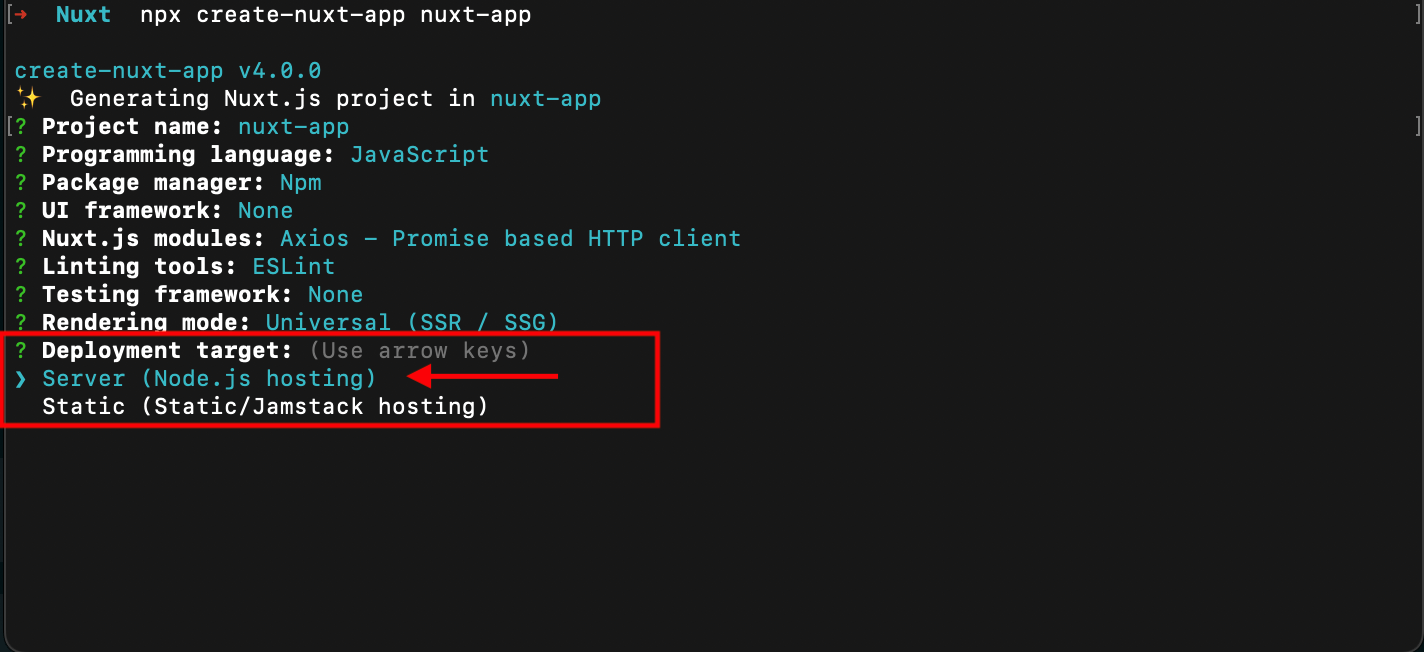
Step 2.2: Choose Deployment mode
Nuxt provides two deployment mode - Server and Static, In this tutorial we are selecting server that will use node.js server
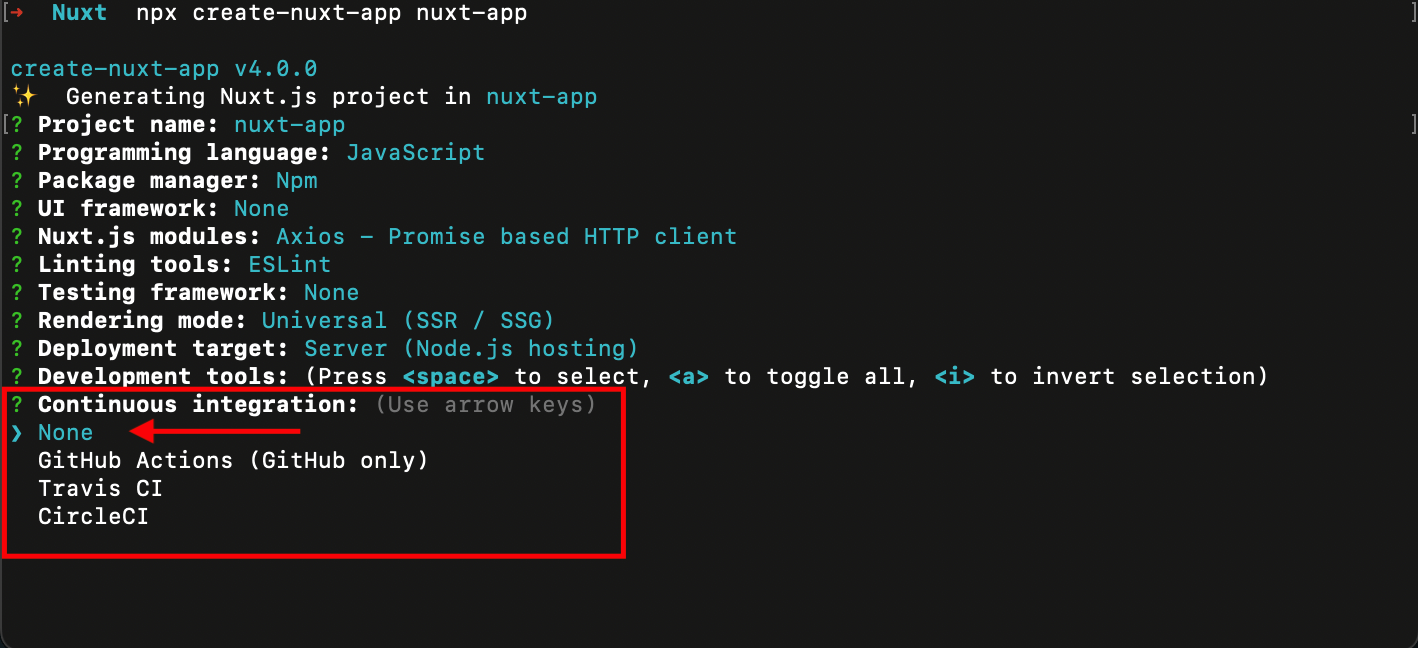
Step 2.3: Choose CI Integration
If you are going use CI/CD pipeline for the code deployment then you choose the respective CI pipeline from the options, but for now we are selecting None.
Step 2.4: Choose Version Control System
If you are going use any version control system to maintain the code like (GitHub, Bitbucket or Gitlab), then you should choose the Git option. Otherwise choose None
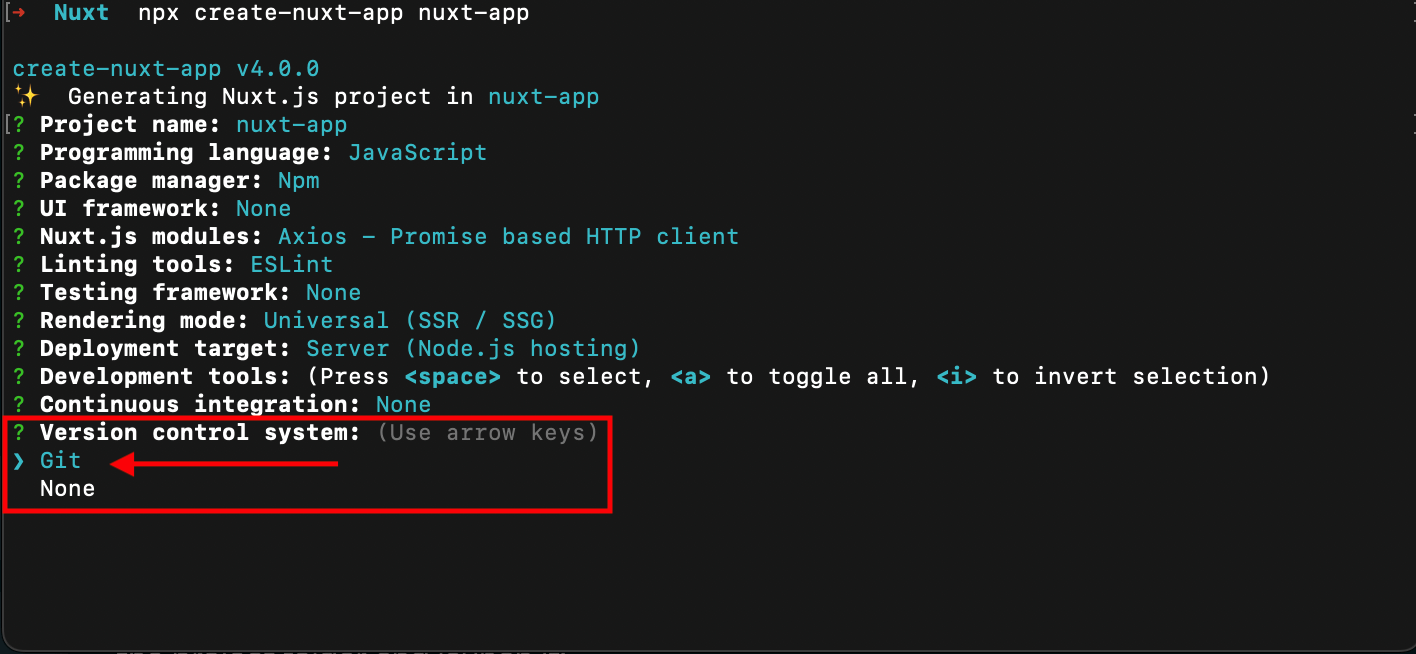
Step 2.5: Done, It will create a project for you and install all the dependencies.

Step 3: Nuxt App Setup Successfully

Step 4: Run Dev Server
cd nuxt-app (project-name)
npm run dev
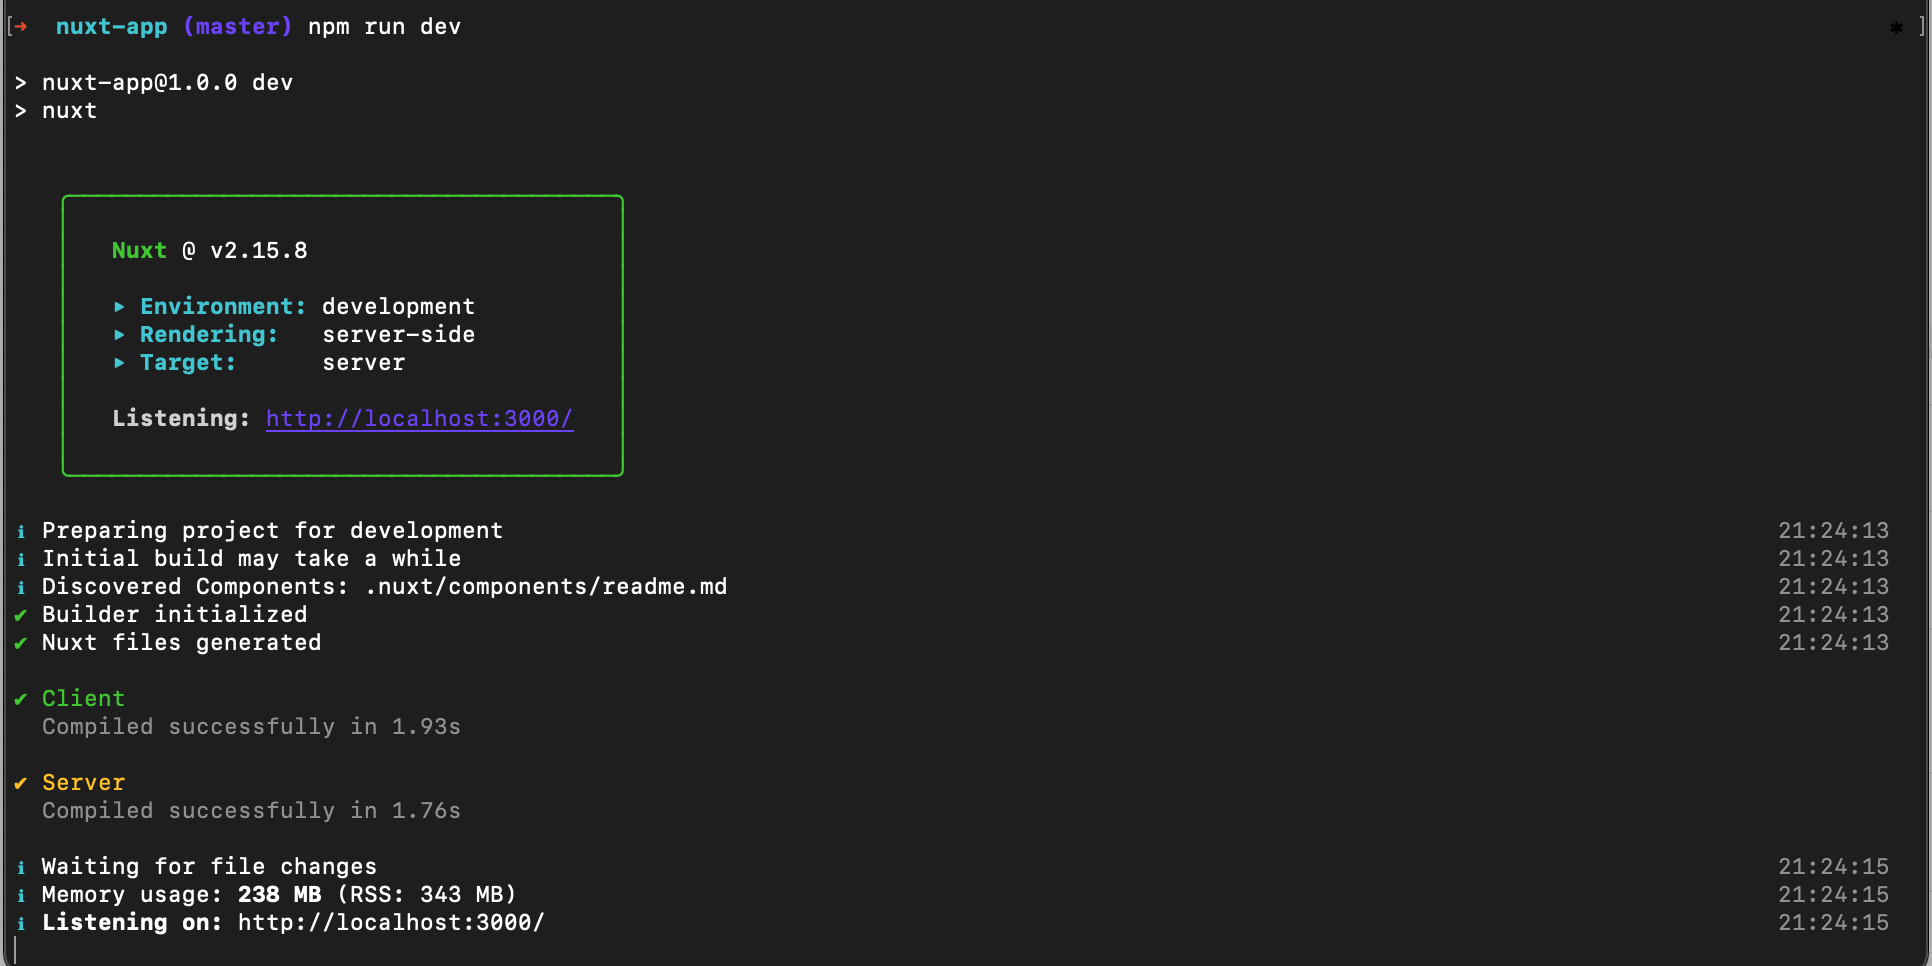
Step 5: Open the URL
Visit http://localhost:3000/

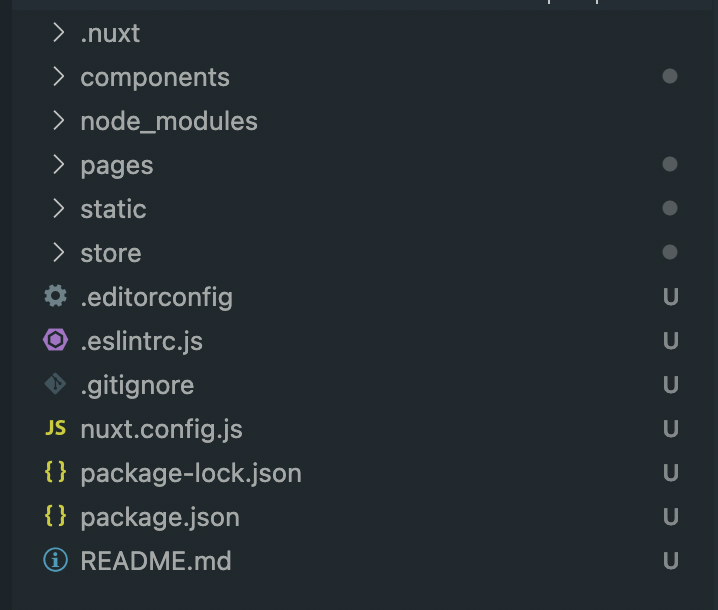
Project structure
Soure Code: Github Repo