Django and OpenAPI 3 - DRF Spectacular
What is an OpenAPI?
API standards all have similar benefits—and OpenAPI is no exception:
- They make it easy to document your APIs.
- They provide tooling that let others explore and test against your APIs.
- They help automatically generate API code for you.
An OpenAPI definition can then be used by documentation generation tools to display the API, code generation tools to generate servers and clients in various programming languages, testing tools, and many other use cases.
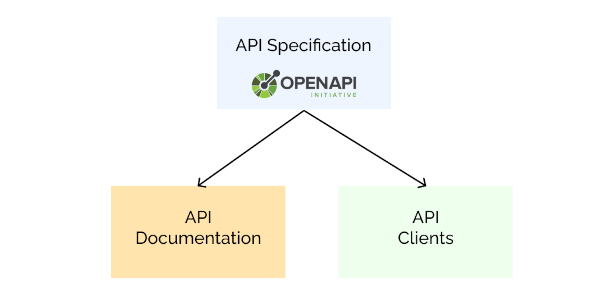
Basically, this one OpenAPI specification will produce documentation, testing tools, and can even generate API client and server code for you.
There are multiple ways you can work with API specifications.
- Some projects might start by creating the API specification before writing any code. In that way, you can even create your server backend automatically (the URLs and views and such—application logic still needs to be coded).
- In the Django, you’d typically go the other way though—starting with the
REST Frameworkcode and generating the API specification from there.
Let’s do the OpenAPI 3.0 configuration with the Django APIs using drf-spectacular.
OpenAPI specifications with drf-spectacular
Going from the Django REST framework code to an OpenAPI3 specification is remarkably easy. All it takes is a little library called drf-spectacular.
drf-spectacular provides—as its tagline suggests—sane and flexible OpenAPI 3 schema generation for Django REST framework.
REST Framework API
A quick reminder about our API. We’ll use a standard ModelViewSet. This ViewSet automatically creates API views to create, list, update, retrieve, and delete.
Example: models.py
class Student(models.Model):
    class Status(models.IntegerChoices):
        ACTIVE = 1, 'Active'
        INACTIVE = 2, 'Inactive'

    class Gender(models.TextChoices):
        MALE = 'M', 'Male'
        FEMALE = 'F', 'Female'
        OTHER = 'O', 'Others'

    name = models.CharField(max_length=120)
    gender = models.CharField(max_length=1, choices=Gender.choices, blank=True)
    is_active = models.BooleanField(default=True)
    status = models.IntegerField(choices=Status.choices, default=Status.ACTIVE)
    created_at = models.DateTimeField(auto_now_add=True)
    updated_at = models.DateTimeField(auto_now=True)
Example: views.py
class StudentViewSet(viewsets.ModelViewSet):
    queryset = Student.objects.all()
    serializer_class = StudentSerializer
Example: routers.py
router = DefaultRouter()
router.register(r'student', StudentViewSet)
Setting up drf-spectacular
Install drf-spectacular with pip:
pip install drf-spectacular
Then add a few lines to the settings file :
INSTALLED_APPS = [
    # other apps here
    'drf_spectacular',
]

REST_FRAMEWORK = {
    # other DRF settings here
    'DEFAULT_SCHEMA_CLASS': 'drf_spectacular.openapi.AutoSchema',
}
Generate OpenAPI3 schema
drf-spectacular provides a management command to generate an OpenAPI3 schema file.
python manage.py spectacular --file schema.yml
And you can also add a URL endpoint for it that will be kept up to date as your API changes.
In the project’s root urls.py add the following:
from drf_spectacular.views import SpectacularAPIView

urlpatterns = [
    # other url patterns
    path('api/schema/', SpectacularAPIView.as_view(), name='schema'),
]
Here’s a snippet from the generated schema file. It’s not too important to read this closely, but you can see it has information about every endpoint, including the path, available methods, security details, and so on.
openapi: 3.0.3
info:
  title: ''
  version: 0.0.0
paths:
  /student/:
    get:
      operationId: student_list
      tags:
      - student
      security:
      - cookieAuth: []
      - basicAuth: []
      - {}
      responses:
        '200':
          content:
            application/json:
              schema:
                type: array
                items:
                  $ref: '#/components/schemas/Student'
          description: ''
    post:
      operationId: student_create
      tags:
      - student
      requestBody:
        content:
          application/json:
            schema:
              $ref: '#/components/schemas/Student'
          application/x-www-form-urlencoded:
            schema:
              $ref: '#/components/schemas/Student'
          multipart/form-data:
            schema:
              $ref: '#/components/schemas/Student'
        required: true
      security:
      - cookieAuth: []
      - basicAuth: []
      - {}
      responses:
        '201':
          content:
            application/json:
              schema:
                $ref: '#/components/schemas/Student'
          description: ''
    ...
Beautiful, interactive API documentation
The first place that the schema shines is in the automatic creation of API documentation. There are a few tools for creating API docs from OpenAPI schemas, with the most popular ones being Redoc and Swagger UI.
Adding this documentation to the Django app is a matter of adding two more lines to the project’s root urls.py:
from drf_spectacular.views import SpectacularRedocView, SpectacularSwaggerView
urlpatterns = [
    # other urls here
    # Swagger UI:
    path('api/schema/swagger-ui/', SpectacularSwaggerView.as_view(url_name='schema'), name='swagger-ui'),
    # Redoc UI:
    path('api/schema/redoc/', SpectacularRedocView.as_view(url_name='schema'), name='redoc'),
]
You can get a feel for these two flavors by viewing the API documentation for this website.
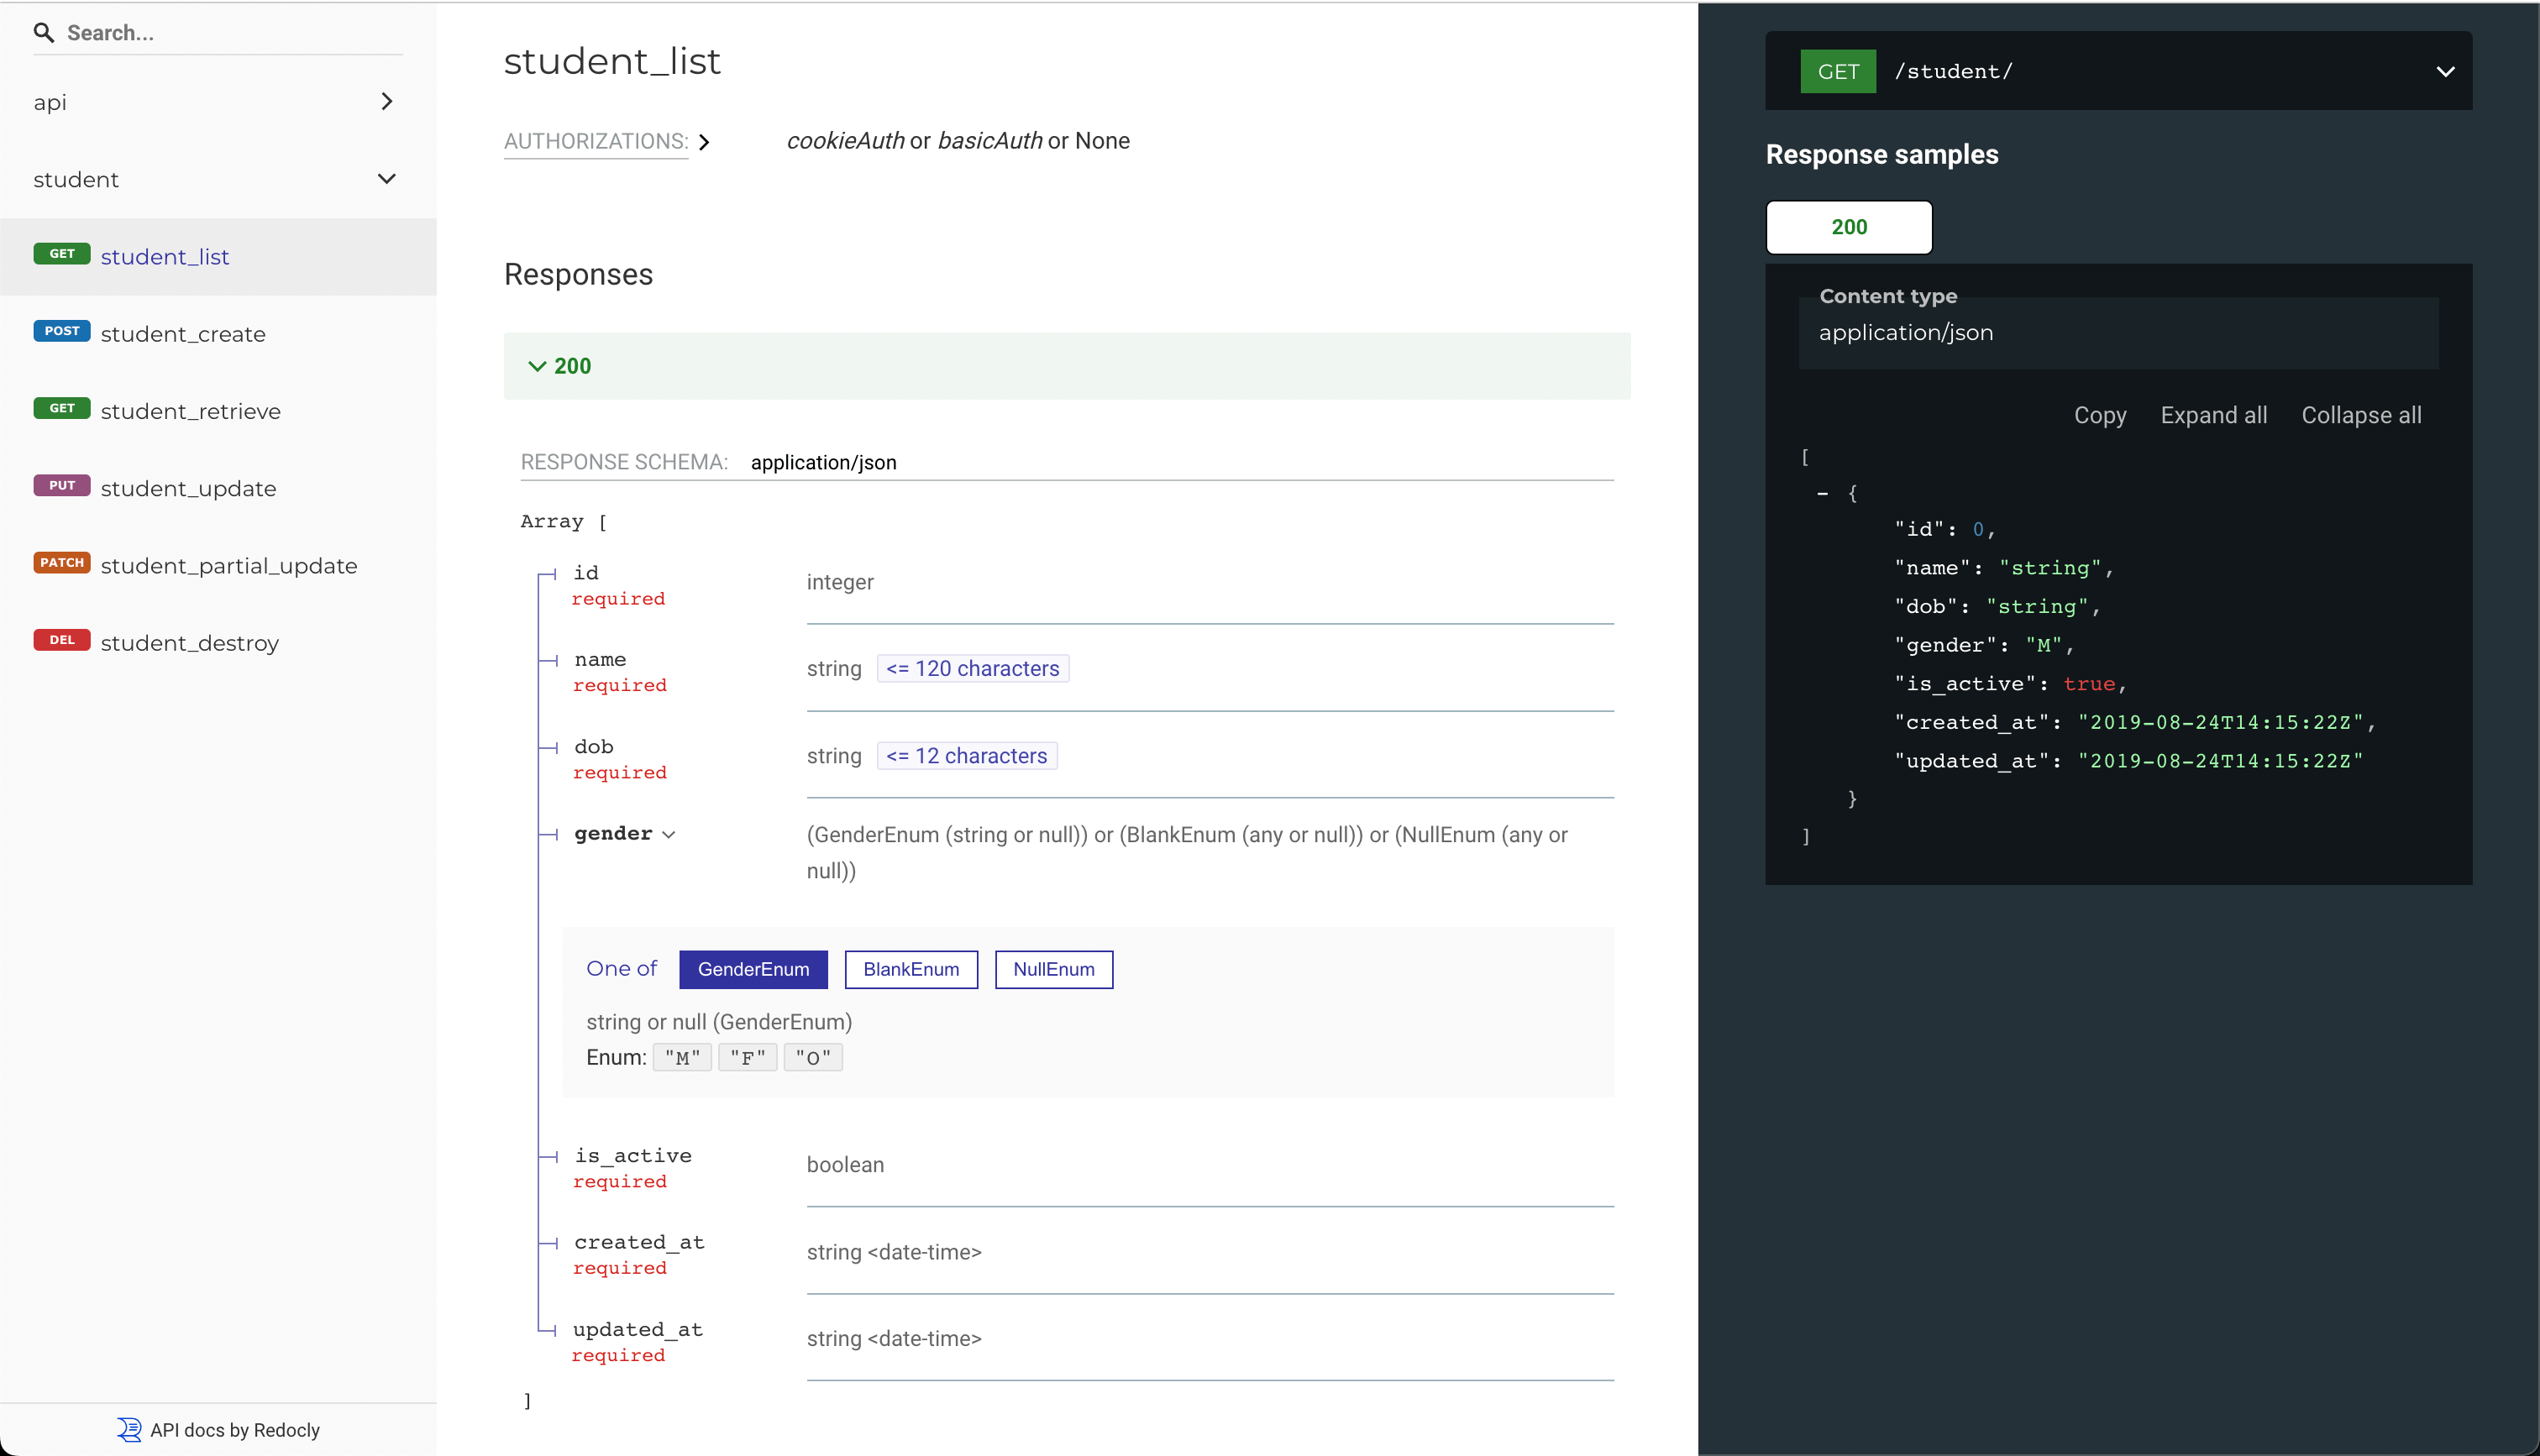
Redoc version:
Swagger-UI version:
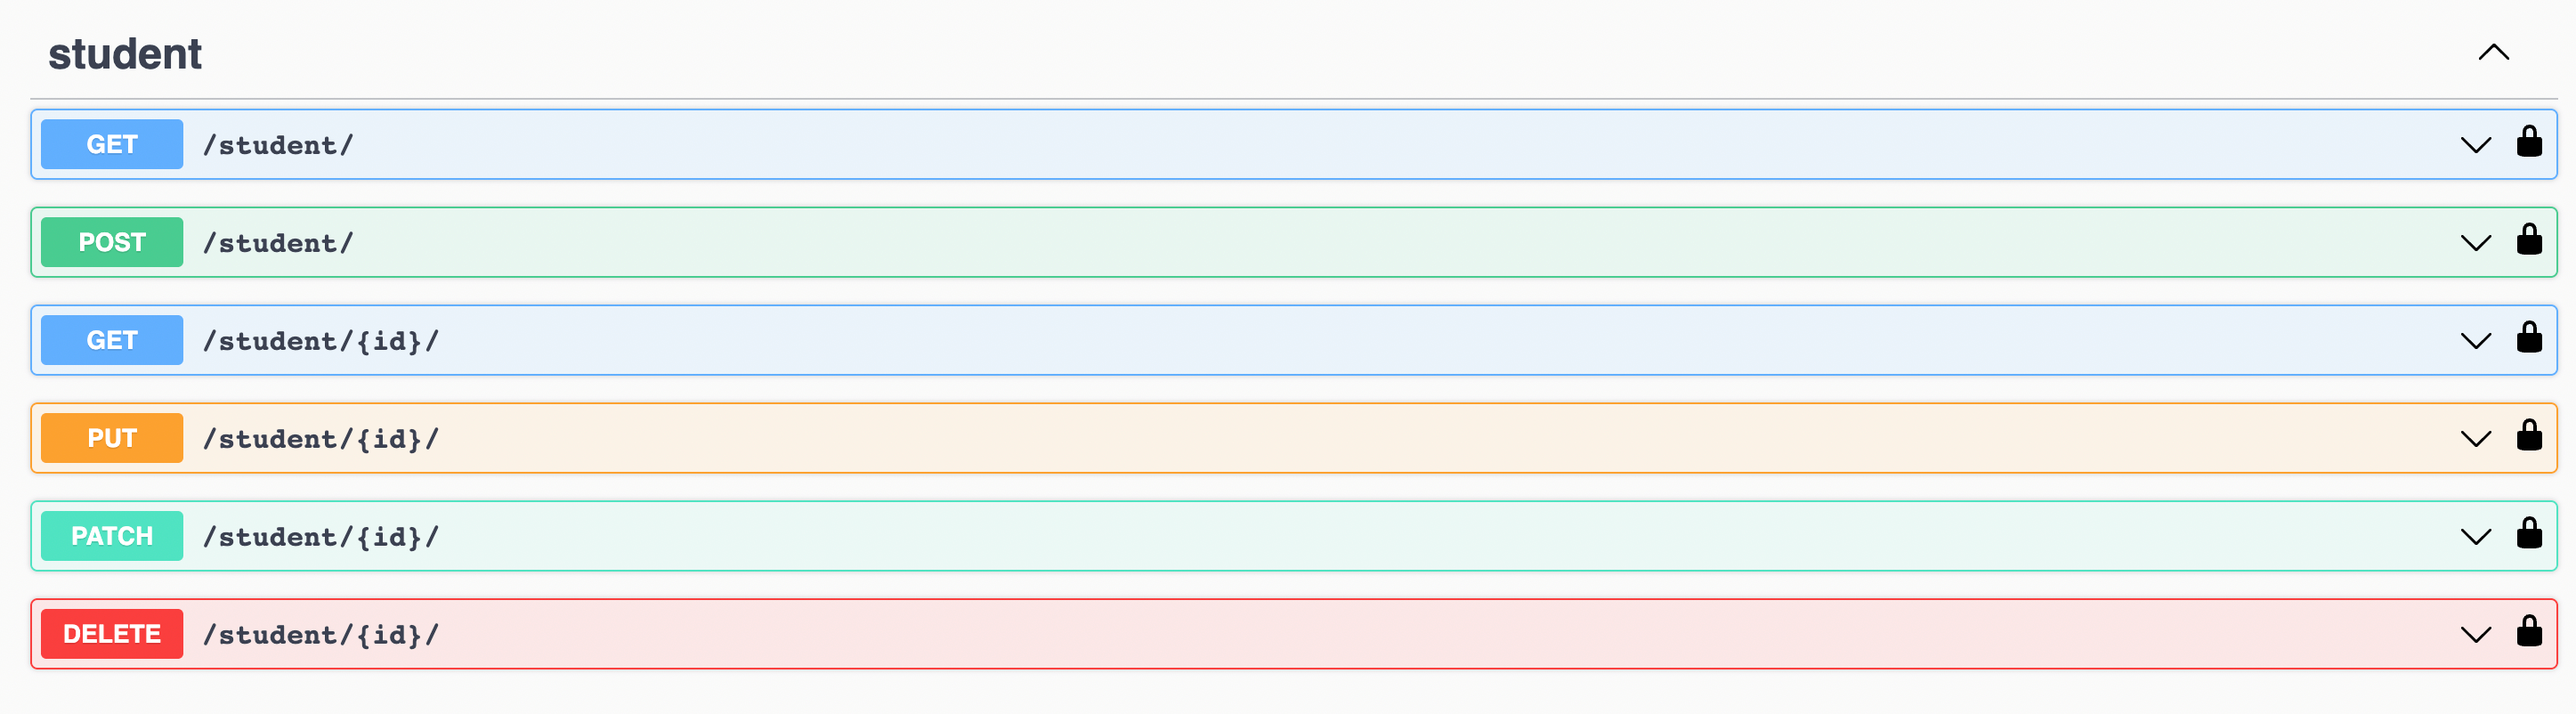
It’s worth noting that not only are these clear documentation of the APIs—they are also interactive. Developers can interact with the APIs directly in the browser, even with authentication and submitting data via POST request. And as an added bonus, the documentation is always perfectly in sync with the code.
Improving the documentation
One problem with automatically-generated API clients is that they don’t always come up with the best names for things.
Fortunately, drf-spectacular has an easy way to customize any of the generated properties in your API using SPECTACULAR_SETTINGS dict in settings.py and a set of @extend_schema decorators.
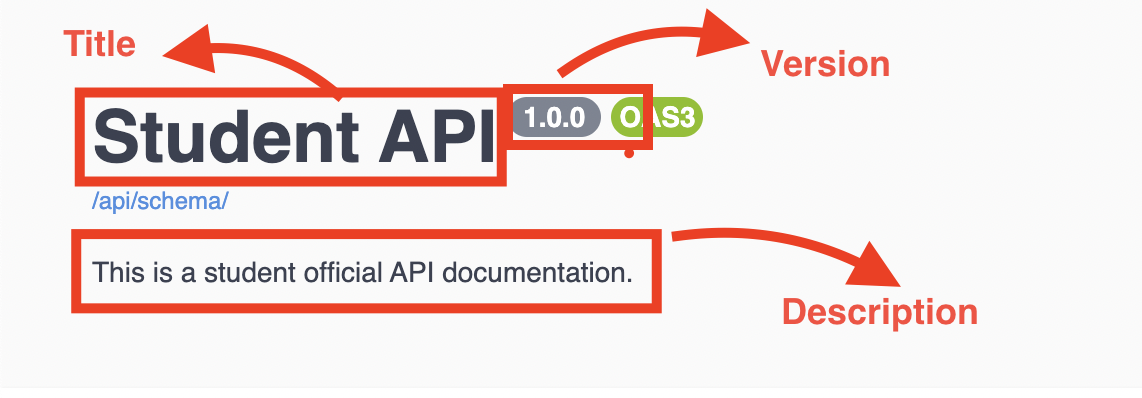
Let’s customize some metadata.
- Create a
SPECTACULAR_SETTINGSdictionary inside thesettings.pyand override the defaults. Have a look at the available settings. - Override: title, descripton and version for the API.
SPECTACULAR_SETTINGS = {
    'TITLE': 'Student API',
    'DESCRIPTION': 'This is a student official API documentation.',
    'VERSION': '1.0.0',
    'SERVE_INCLUDE_SCHEMA': False
}